Crafting-Con Craft Off: Viever

So the challenge, create an everyday look that uses one of the following geeky (come on these are actually pretty cool, wait did I just admit my geekiness?) themes: Harry Potter, Star Wars, Avengers, Disney Princesses, Disney Villains, Hunger Games, The Hobbit, Dr. Who, Mario Brothers, Divergent, Disney (general theme excluding Princesses), and Board Game.

Crystal showed off her Geek badge with an awesome outfit in tribute to Star War's the RebelAlliance flight suit yesterday.  Did you see the vest?!  Brilliant!  The (crafting) force is strong in Crystal.

I have a certain little boy in my house who has been introduced to super heroes in general by his very "geeky" uncle.  My boy is OBSESSED so what's a mom to do but make his super hero dreams come true.  So I picked the Avengers theme.  S is crazy about Captain America, and hey his mama likes watching him too on the big screen.  Last year, we bought a Captain America costume, among several others, and some accessories post Halloween (woot 50%-75% off at Target!) and they get regular play at our house but they aren't the best for every day wear, especially in the summer.  Who wants to get all sweaty in polyester while trying to save the planet!?  And so an idea was born.


That's right my two cuties in decked out in Captain America attire fit for running, jumping, climbing trees, and all in a comfy lightweight cotton knit!

I again used Figgy's Tee for Two. You sick of me using this pattern yet?  Well if it ain't broke don't fix it is a motto here!  But this time I actually did the second of the two patterns included!  V is wearing my first version of the dress! 


I did modify the t-shirt a touch to get the stripes and for some reason I was having major collar issues.  I'm going to blame the knit I used as I've NEVER had this problem before but cutting a touch longer for both collars did the trick and we got those tee over my kids' noggins.  I also added a belt for V's dress as I didn't want to cut up the dress to create the stripes.


For the stripes I took the shirt piece and traced out a curve I wanted to follow then cut that portion of the front off.  Taking that piece I grabbed my handing tracing paper traced out the piece and then mapped out my red and white striped pieces.  I used the same template for V's belt which is why it turned out so wide but it works.  

For the star I used an embroidery file from Embroidery Library called Simple Star.  You can't quite tell from the pictures but I used silver and white coloring on the star to give it more of a popped look.


Anyway my kids were thrilled to wake up and find their shirts.  It spurred a morning of super hero play that included a rescue of the blue dog Patsy from a tree and running around our front yard fighting off imaginary villains.  Gotta get ready to face that big bad world!


Rescuing Patsy proved to be a daunting task only for Big Brother Capt. America with Lil' Sis Capt. America watching on very concerned for Patsy's well being with Patsy's unnamed dog friend.  


V also took the opportunity to do some getting dressed practice while S was up in the tree.  She needed to make sure no one would know her identity...  Can you see her super proud smile while she finally figured out how to get the mask on all by herself?  Sadly I can't say that I made the mask but the kids had to have it out when they saw their outfits.


And so once again Mommy saves the day or at least the morning with a fantastic pattern and a little imagination.  So happy to help my kiddos save the world defeating one imaginary bad guy at a time. Now anyone up for getting some shwarma?


Can't wait to see what the rest of the SHEs have dreamed up and don't forget to vote at the end of the week!  Winner goes on to compete in the Disney Princess theme over at Crafting-Con in September!
--Viever

Crafting-Con Craft-Off: Crystal


You guys, I’m a geek.  Like really, I am.  I am not a hipster geek that wears glasses and think Hayden Christiansen did a good job in Star Wars.  I am a real bonafied geek.  I love all things Lord of the Rings (with the exception of Tom Bombadil- I hate that guy), Harry Potter, Hunger Games, Star Wars, Star Trek, Battlestar Galactica(2004), Firefly & Merlin.  I’ve played world of Warcraft and enjoyed it.  I married a Dungeon Master- yes, the man I love plays D&D.  Yes, I just called it “D&D” and not “Dungeons and Dragons”.  I find science fascinating and feel like Science fiction should become reality before I die. I dress up for renaissance festivals.  I will be Cosplaying at a Comic Convention in October.  I AM GEEK.   So when I heard of Crafting-Con...yeah, I wanted in.


The SHEs are up for a spot in the September theme of Crafting Con (Disney Princesses).  We are going to fight to the...not DEATH, but to the...um...winner?  for that spot!  We decided that we’d each make a look from whichever of the Crafting-Con themes that Spoke to us.  These are the themes:

Harry Potter
Star Wars
Avengers
Disney Princesses
Disney Villains
Hunger Games
The Hobbit
Dr. Who
Mario Brothers
Divergent
Disney (no princesses allowed)
Board Games

WARNING: Massive amounts of geeky information about to seep into your brain.  I hope you’re ready.

My choice was an easy one-I chose Star Wars because that’s the geeky that started it all for most of us.  I had one rule for myself, though... I HAD to use what was in my stash already.  We’re saving for Stan Lee’s Comikaze, so yeah.  No spending!  The big problem I had was color. The original 3 movies (you know, the ones that weren’t mistakes) have very little color.  Lots of grey, black, brown, tan, white...not a lot of BLAMMO!  I LOVE color, so I went to the most colorful costume in the trilogy- the RebelAlliance flight suit.


The rules of CraftingCon state that all items made should be able to be worn not as a costume, but as everyday garments.  I made the tunic from the inspiration of the Hummingbird dress by Rabbit Rabbit creations.  I don’t own that pattern but I wanted to make a top like that...but no spending money.  I drafted something similar on my own and I love the way it turned out!  If you can't draft on your own, just buy the pattern.  It's easier that way anyhow. I used orange fabric that I previously got at the thrift store for $1 for a little over a yard...SCORE!  The white was an upcycle from an old RTW dress that no longer fit my girl. The back straps represent the X-wing fighters that Luke flies when he made the shot that destroyed the Death Star..totally went there.  She can be Anti-republic everywhere she goes.  People at the grocery store will be like “There’s a cute girl in an orange top.”  They have no idea that she can blast away an epic weapon and space station with one little PEW!


The vest is super awesome and my favorite part.  I wanted it to look like the flight vest, but not like a costume.  I added some silver and black piping to make an otherwise simple vest into something pretty epic.  The patch on the front of the vest is the Symbol for the Jedi Order and is just a pinned on patch. It’s a little nod to Luke’s relationship with the force.   It comes off and makes this vest a bit but more “every day”.  The applique on the back is permanent because it can be.  No one sees the back of you until you walk away.  She’ll walk away in geeky style, baby. This emblem is the symbol of the Rebel Alliance.  In the movie it can be seen on Luke’s helmet, but I decided to throw it on the back. The pattern I used is an altered version of pattern 118 from the Little Darlings line by Enchanted Forest Inc.


That’s my whole look and I hope you geeked out a little.  I’m super happy that I was able to take neon orange flight suit inspiration and turn it into something cute for my girl.  And now she looks like a nerd girl; and nerd girls are BADASS.


Do YOU want to compete in future CraftingCons?  Sign up here!  Spots are filling fast!

-Crystal-

Making a Hobby Horse Fun

Ever find yourself in a crafting funk?  I was there about a month ago when a friend of mine contacted me asking if I thought I could make a hobby horse for her niece's 2nd birthday.


We messaged back and forth picking fabric and notions and I finally got excited about trying something new.  You know that excited can't wait to get started and for little packages to arrive in the mail feeling, I had it.  But timing worked out that the fabric showed up right before we left for our vacation so starting on the hobby horse had to wait.

Two weeks later, I finally got started with a nice little shopping trip for the making items I didn't have like pinking shears and long doll needles.  Then I had to wait for nap time (so much waiting!) before I could download the Whimsy Wooie Pattern and start cutting.

Then the anticipation of getting started gave way to doubt.  What if this turns out horribly!?!  Well too late now, gotta at least try.  So I carefully cut fabric, and I mapped out the type of eye my friend had requested.  And then nap time was over, and I had to wait some more.


That evening I hand stitched the eye detailing.  (Something I could do while the kids were playing in the yard, and I sat on the deck!)  Using my spray adhesive I repeatedly placed the eyes trying to figure out a placement that would allow for good side and front view.  I didn't want the side to look good but then have the eyes too close together in appearance from the front.  Once the kids were in bed I machine stitched the eyes the finished eyes to each head panel.


Once the head was together and I cut the hair strips I was starting to feel more confident again.  I can do this.  It's looking like a horse!  Stuffing with small handfuls allowed me to get the full and firm look I was going for.  Then after seeing how the hair was lying over the eyes and where I would want the horn I trimmed the "bangs" and actually cut out some of the hair material to allow for the horn placement to be where I wanted it.

 I asked Crystal and Jen how they had attached the ears on their wooie's when they did them in the past and just like on the FB board each had their own preference on how to do them.  Crystal is a sew after stuffing and Jen is a sew before stuffing.  I went with after stuffing using a ladder stitch as I didn't want the seam line showing.  Did the same for the unicorn horn.  Maybe Karly will have to make her kiddos a wooie to balance out the ears before or after stuffing within the SHEs.


Stitched in the mouth and added the bridal and the fabulous buttons (from FRANCE!).  Looking more and more like a unicorn a 2 year old will be proud of (and to be honest this mama was pretty proud of too).  We are almost done!


Next was a trip to Home Depot for the dowel and rubber tipped stopper.  That was an adventure all on it's own.  I went in the evening, and I swear there was NO ONE THERE.  I found the dowels in the wood area with the other dowels.  Then the epic search for the rubber tipped stopper.  I finally found a Home Depot employee and what do you know as soon as I start to ask my question another (male) customer steps in front of me and asks a question, seemed like a follow up question to something the guy had asked earlier so I let it go and waited my turn.  Then as that guy walked off ANOTHER guy stepped up and was asking his question to which the home depot employee went off to show him whatever it was they needed to find.  On my own again.  And home depot's website to the rescue.  Plugged in my "local" Home Depot and looked to see if they had them in stock and there in the bottom corner the aisle location.  Hallelujah!  If you are curious it was with other non slip furniture items which was NOT with the other furniture aisles but rather the "random" aisle that has things like the locking mail boxes.

My darling husband and father in law then chopped the dowel down to size and drilled the holes.  While they enjoyed s'mores after their hard work, I sat inside finishing stuffing the horse and attaching the dowel to the bottom fabric cuff while waiting for the kiddos to fall asleep so I could too join them for some dessert fun.  Well the kids took FOREVER to fall asleep so the horse was completed before they finally took their trip to dreamland.  But we have a finished Wooie!!!!


--Viever


Baked Blueberry Oatmeal Recipe


Hi all, Jen here! I think I might be recipe girl haha. I do participate in other crafting forms though and end of July you will see some other fun from me!

Road Trip Pattern Club!


It’s summer!  For most people that means vacations and family fun.  For seamstresses it means all of that PLUS some awesome sewing.  If you haven’t heard about the Road Trip Pattern Club, you’re about to.  It’s FIVE awesome patterns for one low price ($35) all designed and geared toward vacations. One new pattern releases every month for 5 months.  They’re all a big secret until the pattern is revealed.  All you know is the designer and then it’s like HAPPY BIRTHDAY!  So far there has been The Road Tripper Duffle bag by Betz White, then the Kimono Wrap by Modkid, and today is the Tortola Tank by Sis Boom.  I was lucky enough to be able to test 2 of these patterns and I’m sharing them with you.   Get ready to want to leave town....  


Aren’t they summer funneriffic? That’s a word I made up just because I can...my post, my words.

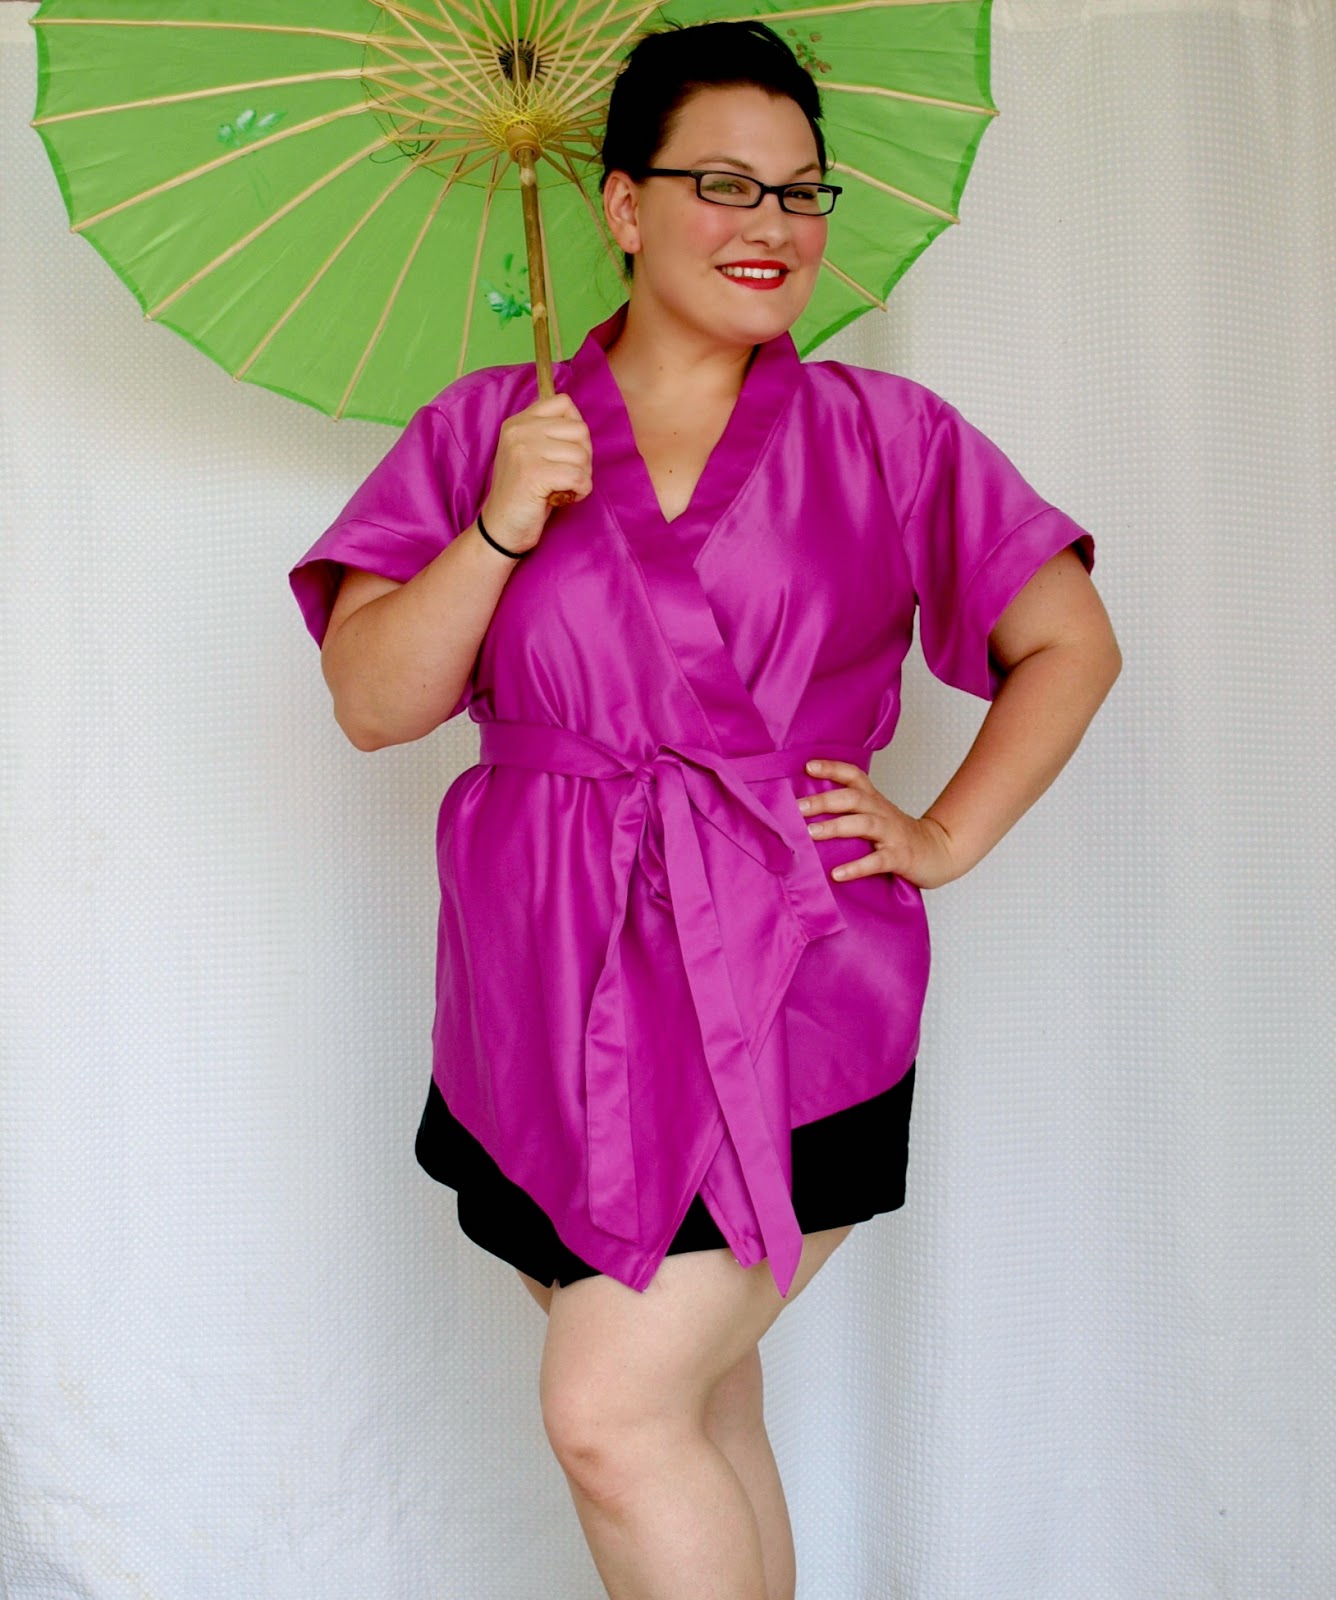
First up is the Kimono wrap from Modkid!  This pattern literally comes in EVERY SIZE because it is made completely by using your own measurements.  There are no pattern pieces; you make your own using Patty’s guide.  It’s not hard AT ALL, so stop your sighing.  Anyone can (and should) make this.  I think it’d be great in terry for a pool robe, in cotton for a little coverup, or in satin (like I have) for getting ready for a night out- great for keeping powder, makeup and hairspray off of your pretty fancy dress.   I also think that with a little embroidery, these would make the cutest bridal party getting ready accessory. 


The second pattern, The Tortola Tank by Sis Boom, is more day to day whether you’re going shopping, riding in the car, or even going out at night.  This tank in sparkles or shimmer paired with skinny jeans and sexy shoes would be awesome for a karaoke night with the girls!  It’s designed to be made with WOVEN fabrics, but when cut on the bias makes a pretty drape and adds a little stretch for getting it on and off.  The size range is from XS (0-2)-3X (24-26W).  You get to pick your length, too!  I didn’t make this one on the bias because I’m a rebel!  Actually, I just wanted vertical stripes.  It still fits great and is super comfy, just doesn’t have that draping that it’s designed to have.  If you like tanks, this is a great pattern for you. By the way...45 minutes to sew TOPS from cut to finish.  No lie.


Anyway, I hope I convinced you to buy a member ship to the club.  There are still 2 surprise designs waiting for you and the previous 3 will get to you too.   YOU NEED THIS.  Your vacation wardrobe is waiting to be made. you can buy HERE:

All of the patterns will be available to purchase separately from the individual designers starting October  1st, but your chance for the best deal is now!

Still not sure? 


And how about now?


And here’s a backstage shot of my muslin for my Tortola.  I felt it needed something...and I had just learned how to use my embroidery machine, so.....


 -Crystal-

Pleated Skirt Tutorial


Have you heard of Skirting the Issue?
The really amazing charity event that Simple Simon & Co. are doing?
They are having bloggers post simple skirt tutorials that people can make for girls in Foster Care. I am so excited to be a part of it.
So, on to my tutorial so you can start making some skirts for some amazing girls!

Sewing on the cheap

I don't know about you but lately my sewing budget has been in the red and doesn't have any hope of being in the black any time soon so this summer I'm making do with what is in my stash and upcycling things us grown ups in the house are no longer using.


On top of my upcycle pile are a bunch of Mr. Viever's t-shirts that have a lot of life left in them but he just doesn't care for the color or there is a hole somewhere or a break in the seam.  I used my tried and true t-shirt pattern (you know the one you've see a million of from me, Figgy's Tee for Two) and cut the shirts along the seams for my working pieces.  I cut both the front and back along the bottom edge so that I had no need to hem.